This recipe is from City Tavern Restaurant. They claim that Pepperpot Soup was the soup General George Washington fed his troops during the Revolutionary War. It has been adapted to today's busy lifestyle, but when I tasted it, I could imagine myself sitting in a cozy cabin next to the fireplace. Its a savory, spicy experience and fits the bill for comfort food in my book. The ingredients may be a little different, but it's worth it.
Ingredients:
2 lb cubed roast beef
2 T vegetable oil
1 medium white onion
4 garlic cloves chopped
1/4 habanero pepper, seeded and chopped (this is a hot one so be careful!)
1 c chopped green onion
1 lb taro root, peeled and diced (a little slimy raw, but it doesn't cook that way. It is the texture of a potato with a mild flavor)
1 gallon beef stock
2 bay leaves
1 t chopped fresh thyme (1/3 t dried)
1 T fresh ground allspice (1 t dried- though I think it could have used a touch more)
1 T freshly ground black pepper, plus more
1 lb collard greens rinsed and chopped
salt
Directions:
In a large stock pot, saute the onion and garlic in oil over high heat for 3-5 minutes, until onion is translucent. Add green onions and taro root. Saute 3-5 minutes until translucent. Add the stock, bay leaves, thyme, allspice, and pepper. Bring to a boil over high heat. Add beef. Reduce heat to medium and cook until beef and taro root are tender.
Stir in collard greens. Reduce the heat and simmer for about 5 minutes, until the collard greens are thouroughly cooked. Add habanero pepper. Season with salt and pepper to taste.
From: City Tavern Restuarant, Philadelphia, PA
Thursday, November 18, 2010
Friday, November 5, 2010
Sweet Potato Buttermilk Pie
I think I can adapt this one to my diet- definitely something I need to try!
1 1/2 pounds sweet potatoes (about 2 medium potatoes), peeled and chopped into a 1/2-inch dice
4 tablespoons unsalted butter, melted
2 tablespoons fresh lemon juice (optional)
1/2 teaspoon freshly grated nutmeg
1/2 teaspoon ground cinnamon
1/2 teaspoon kosher salt
3 large eggs, separated
1/2 cup sugar
2 tablespoons all-purpoe flour
3/4 cup full- or lowfat buttermilk (or, you can make your own)
1 All-Butter, Really Flaky Pie Crust (a half recipe will yield a single crust), prebaked (instructions below)
Whipped cream, for serving
Preheat the oven to 375°F.
Pour 1 1/2 inches of water into a 3-quart stock part with a strainer basket suspended over it and bring to a boil over medium-high heat. Add the sweet potatoes, cover and steam until fork-tender, about 20 minutes. Place the steamed sweet potatoes in a large bowl and let cool to room temperature. Mash them into a smooth puree with a fork or potato masher (though I suspect that a potato ricer would also do a great job). You should have 1 1/4 cups puree; discard any excess (by topping with a pat of butter, sprinkling with salt and making yourself a most-excellent snack). Add the butter, lemon juice if using, nutmeg, cinnamon and salt and mix thoroughly with a wooden spoon or rubber spatula after each addition.
In a small bowl, beat the egg yolks lightly with a whisk, about 30 seconds. Add the sugar and beat until they’re a creamy lemon-yellow color, about 1 1/2 minutes. Add the egg mixture to the sweet potato mixture and stir until the eggs are thoroughly incorporated and the filling is a consistent bright orange color. Add the flour a little at a time, stirring after each addition until thoroughly incorporated. Add the buttermilk and again stir until smooth and even.
With a cleaned whisk (or electric hand mixer), whisk the egg whites to soft peaks in a clean, dry bowl. With a wooden spoon or rubber spatula, gently fold the egg whites into the sweet potato-buttermilk mixture until thoroughly combined. Pour the mixture into the prebaked crust and bake on the middle rack of the oven until the center is firm and set, 35 to 40 minutes.
Remove the pie from the oven and cool completely on a rack. Serve at room temperature (or cold from the fridge; you can cover it with plastic wrap before chilling) with a dollop of whipped cream.
To pre-bake your pie crust, choose a method: “Proper” method — Lay a sheet of aluminum foil over the dough and carefully scatter pie weights, dried beans or pennies over it. Bake on the middle rick of your oven at 325°F for 12 to 15 minutes. Remove the pie weights and the foil, prick the bottom of the crust with a fork, and bake for 10 minutes more.
Deb’s “Cheater” method — Freeze your rolled-out pie shell for 20 to 30 minutes until solid. Press a piece of buttered foil, buttered side down, very frozen shell and blind bake it at 325°F for 20 minutes, then carefully pull back the foil, press any part of the crust that has bubbled up gently back with the back of a spoon, prick the bottom of the crust with a fork, and bake for 10 minutes more.
From: smittenkitchen.com
Wednesday, October 13, 2010
Chocolate Avocado Frosting
Ingredients:
1/4 c peanut or almond butter
1/4 c honey (plus more)
1/8 c water
1/8 c cocoa powder
pinch of salt
1 medium avocado
1 T coconut oil (or butter)
1 t vanilla
Blend in blender. Gets better if refrigerated overnight.
From: kaylaeatshealthy.blogspot.com
1/4 c peanut or almond butter
1/4 c honey (plus more)
1/8 c water
1/8 c cocoa powder
pinch of salt
1 medium avocado
1 T coconut oil (or butter)
1 t vanilla
Blend in blender. Gets better if refrigerated overnight.
From: kaylaeatshealthy.blogspot.com
Grain Free Chocolate Cake
Ingredients:
1-15 ounce can of unseasoned black beans
OR 1 1/2 cup cooked beans, any color
5 large eggs
1 tablespoon pure vanilla extract
1/2 teaspoon sea salt
6 tablespoons unsalted organic butter OR extra virgin coconut oil
3/4 cup erythritol plus 1/2 teaspoon pure stevia extract OR 1/4-1/3 cup honey plus 1 teaspoon stevia OR 1 cup Splenda
6 tablespoons unsweetened cocoa powder
1 teaspoon aluminum-free baking powder
1/2 teaspoon baking soda
1 tablespoon water (omit if using honey)
Mint Chocolate variation:
2 teaspoons mint extract (in place of 2 teaspoons vanilla)
Preparation:
Preheat oven to 325 degrees Fahrenheit. Spray a 9" cake pan with extra virgin olive oil cooking spray, or just grease it with a thin layer of butter. Dust cocoa all over the inside of the pan, tapping to evenly distribute. Cut a round of parchment paper and line the bottom of the pan, then spray the parchment lightly.
Drain and rinse beans in a strainer or colander. Shake off excess water. Place beans, 3 of the eggs, vanilla, stevia (if using) and salt into blender. Blend on high until beans are completely liquefied. No lumps! Whisk together cocoa powder, baking soda, and baking powder. Beat butter with sweetener (erythritol or honey) until light and fluffy. Add remaining two eggs, beating for a minute after each addition. Pour bean batter into egg mixture and mix. Finally, stir in cocoa powder and water (if using), and beat the batter on high for one minute, until smooth. Scrape batter into pan and smooth the top. Grip pan firmly by the edges and rap it on the counter a few times to pop any air bubbles.
Bake for 350 degrees for 40-45 minutes. Cake is done with the top is rounded and firm to the touch. After 10 minutes, turn out cake from pan, and flip over again on to a cooling rack. Let cool until cake reaches room temperature, then cover in plastic wrap or with cake dome For BEST flavor, let cake sit over night. I promise this cake will not have a hint of beaniness after letting it sit for eight hours! Frost immediately before serving.
From: healthyindulgences.blogspot.com
Grain Free Pumpkin Bread
Ingredients
- 1 ½ cups almond flour
- ¼ teaspoon sea salt
- ½ teaspoon baking soda
- 1 teaspoon ground cinnamon
- ½ teaspoon ground nutmeg
- ¼ teaspoon ground ginger
- 1 pinch ground cloves
- 2 tablespoons butter
- ¼ cup raw honey
- 2 large eggs
- 1 cup fresh baked pumpkin
Instructions
- In a large bowl combine almond flour, salt, baking soda, cinnamon, nutmeg, ginger and cloves
- Mix butter, honey, eggs and pumpkin until smooth
- Stir wet ingredients into dry
- Grease a loaf pan with butter and pour in batter
- Bake at 350° for 40-45 minutes
Saturday, October 2, 2010
Quick Doughnuts
Every conference we carry on a little tradition that the sistas started (that would be my mother's sisters- of which I emphatically claim to be one of. No, not literally, but I'm part of the sistahood). While the men are at the priesthood session, the women make homemade doughnuts. Stacks and stacks. Covered. In chocolate. Powdered sugar. Cinnamon sugar. If you are JD, the doughnut is merely the vehicle to cram as much sprinkles into your mouth as humanly possible. Since it's just JD and I, we make ourselves sick and then give the rest away because I don't know how to reduce. The tradition is stacks and stacks.
Well this year is one of those years. My mom calls them "Chicken Nugget Thanksgivings". Trying to make the perfect recipe of doughnuts was just not in the cards. So I discovered this little trick:
1. Buy refrigerated buttermilk biscuits.
2. Cut a hole in the center just like you would for doughnuts.
3. Fry.
There you have it. Quick and easy. Now- I have to say that they are not as good as the real deal. And when I tasted them I was disappointed. I tried dipping in chocolate and again, disappointed. Then I dipped them in cinnamon sugar. That's when the magic happened. Yummy! I didn't have any powdered sugar so I don't know if that would have been good. But also, I bought the regular refrigerated biscuits instead of buttermilk. I wonder if that would have made a difference.
All in all, the perfect doughnut, this is not. But a great and fast substitute? Definitely.
Pumpkin Butter
Ingredients
- 1 cup Pumpkin Puree
- 1 cup Plain, Nonfat Yogurt (vanilla Works Just As Well)
- 1 teaspoon (more If Desired) Pumpkin Pie Spice
- 1 cup (heaping) Powdered Sugar
Preparation Instructions
Stir all ingredients together well. Store in the refrigerator; will keep for five to six days.
From: pioneerwoman.com
Tuesday, September 28, 2010
Friday, September 17, 2010
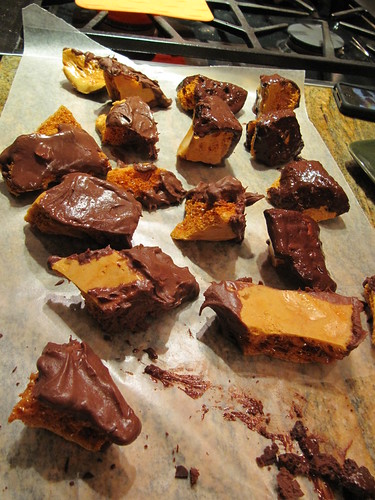
Chocolate Covered Honeycomb
How to make Honeycomb
* 2 cups granulated sugar
* 1/2 cup Light Corn Syrup
* 1/4 cup Honey
* 1/4 Water
* 1 Tbsp (heaping!) Baking Soda
You need a candy thermometer. Do not attempt this project without one. Take a baking pan and rub butter all over the bottom of the pan and lightly flour it.
1. Add the sugar, corn syrup, honey and water into a pot that has at least 3 times the head space. The entire thing poofs up like crazy in a bit and overflowing sugar is a huge mess.
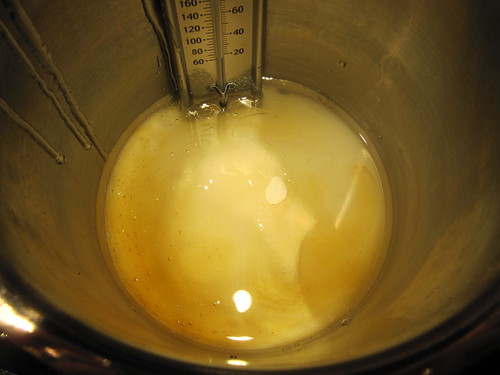
2. Stir the ingredients together until smooth with no lumps.
3. Put the candy thermometer into the mixture. Turn the heat onto medium-high.
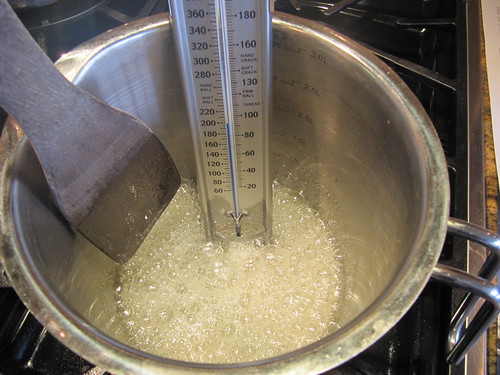
4. Wait, no stirring, until the mixture reaches at least 300 degrees. The brown caramel color is what you're going for. Turn the heat off. Wait for at least a minute until the mixture has stopped bubbling.

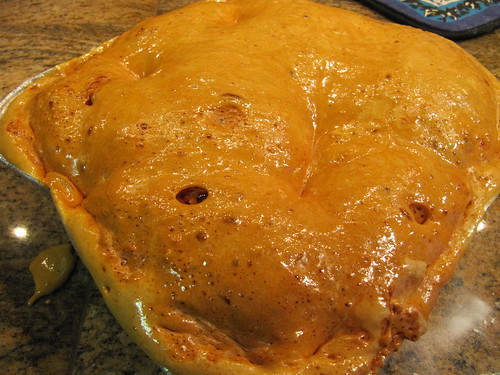
5. Add that generous Tablespoon of baking soda to the mixture. Stir. Stir. Stir. Watch for the poof. See it? It keeps growing.
6. Pour into your lightly floured, buttered pan. Don't fill it up all the way because the entire mixture keeps poofing.
7. Let sit for 2 hours until hard. Hit with a hammer to break up.
8. Optional: Dip into chocolate for a sweet yummy surprise.
From: soap-queen.blogspot
* 2 cups granulated sugar
* 1/2 cup Light Corn Syrup
* 1/4 cup Honey
* 1/4 Water
* 1 Tbsp (heaping!) Baking Soda
You need a candy thermometer. Do not attempt this project without one. Take a baking pan and rub butter all over the bottom of the pan and lightly flour it.
1. Add the sugar, corn syrup, honey and water into a pot that has at least 3 times the head space. The entire thing poofs up like crazy in a bit and overflowing sugar is a huge mess.
3. Put the candy thermometer into the mixture. Turn the heat onto medium-high.
4. Wait, no stirring, until the mixture reaches at least 300 degrees. The brown caramel color is what you're going for. Turn the heat off. Wait for at least a minute until the mixture has stopped bubbling.
5. Add that generous Tablespoon of baking soda to the mixture. Stir. Stir. Stir. Watch for the poof. See it? It keeps growing.
6. Pour into your lightly floured, buttered pan. Don't fill it up all the way because the entire mixture keeps poofing.
7. Let sit for 2 hours until hard. Hit with a hammer to break up.
8. Optional: Dip into chocolate for a sweet yummy surprise.
From: soap-queen.blogspot
Friday, September 3, 2010
Vietnamese Spring Roll Salad
Glazed Pork
1/4 c sugar
1/2 c water
2 t fish sauce
2 t soy sauce
2 T oil
Heat water and sugar over medium high heat until carmelized (about 15 minutes). Remove from heat. Slowly drizzle in 4 T or so of hot water and whisk until smooth and coats the back of spoon. Add fish sauce, soy sauce, and oil. Brush onto meat. Let sit 20 minutes and grill:
1 lb. pork loin, sliced into large 1/4 in thick pieces
Let sit for 10 minutes, then slice thinly. (Note: Don't dip the yucky raw pork brush into your glaze, just drizzle it on and then brush. Reserve left over marinade to pour over your salad because it is sooooooo good!)
Meanwhile, whisk or blend together:
Hoisin Sauce
1/4 c. hoisin sauce
1/4 c. peanut butter
2 cloves garlic, crushed
1 T rice vinegar
Water until consistency desired
And chop up:
Lettuce
Basil
Cilantro
Chives/Green Onions
Carrots (shredded)
Cucumbers (very long, thin slices)
Noodles (thin, rice, whatever)
This can be made as a salad, as lettuce wraps, or in traditional rice-paper wrappers. I love the idea of wraps, but the truth is they are so messy we always end up eating it as a jumbled up salad, anyway! This is our new family favorite, and pork is so cheap that when you add herbs from the garden it is a very inexpensive but tasty meal that satisfies the meat lovers, veggie lovers, and pasta lovers alike in our family.
From: nessaandmichael.blogspot.com
Monday, August 23, 2010
Carlo’s Bakery Simple Buttercream Frosting
Ingredients:
1 cup sugar
3 tablespoons corn syrup
1/2 cup water
3 eggs
1 pinch salt
1 pound butter
Directions:
1.Put sugar, corn syrup and water in a saucepan over high heat.
2.Meanwhile, beat eggs and salt until fluffy.
3.When all of the sugar is dissolved and the mixture is boiling, pour over beating eggs.
4.Cut butter into cubes.
5.When the eggs-sugar bowl is lukewarm to the touch, slowly add butter while continuing
to beat until fluffy and smooth.
Saturday, July 3, 2010
Quick and Easy Flourless Torte
- 8 oz Ghiradelli Bittersweet Chocolate, chopped
- 1/2 cup butter
- 3/4 cup white sugar
- 3 eggs, beaten
- 1 teaspoon vanilla extract
Directions
- Preheat oven to 300 degrees F (150 degrees C). Grease an 8 inch round cake pan, and dust with cocoa powder. (NOTE: Use a spring form pan or put parchment on the bottom of the cake pan.)
- In the top of a double boiler over lightly simmering water, melt chocolate and butter. Remove from heat, and stir in sugar, cocoa powder, eggs, and vanilla. Pour into prepared pan.
- Bake in preheated oven for 35-40 minutes. Let cool in pan for 10 minutes, then turn out onto a wire rack and cool completely. Slices can also be reheated for 20 to 30 seconds in the microwave before serving.
Wednesday, June 30, 2010
Microwave Corn on the Cob
Why would one need to know this method? Let's just say that if you happen to buy a bunch of corn on the cob and come home to realize that you do not own a pot big enough to boil it all in, this method is handy. Ah, the beauty of google.
Soak corn, husk and all, in a large pot or the sink for at least 1/2 hour. I soaked mine for probably about an hour or so.
Drain and stick 2 ears of corn in the microwave for about 8-9 minutes.
Let corn cool for about 10-15 minutes. Shuck and enjoy!
This tasted just as good as boiling it.
Soak corn, husk and all, in a large pot or the sink for at least 1/2 hour. I soaked mine for probably about an hour or so.
Drain and stick 2 ears of corn in the microwave for about 8-9 minutes.
Let corn cool for about 10-15 minutes. Shuck and enjoy!
This tasted just as good as boiling it.
Sunday, June 27, 2010
Wednesday, June 23, 2010
Cookie Salad
If it's a salad, it's got to be healthy, right?
This is the original recipe:
1 pint strawberries
2 cups seedless grapes
1 small can pineapple tidbits, drained
2 bananas, sliced
1 12 oz carton Cool Whip
1 3 oz package instant vanilla pudding
1 cup buttermilk
1 pkg fudge striped cookies, broken
Combine fruit. Mix Cool Whip, buttermilk, & dry pudding mix and a separate bowl. Fold into fruit. Just before serving, fold in broken cookies. Serves 20.
You can vary the fruit. Example- use 2 lbs. strawberries, 5 bananas, 1 can pineapple chunks (drained), and 1 can mandarin oranges (drained). (That's just for the single recipe, not doubled.) Use the store brand fudge-striped cookies. Cheaper and not as waxy.
From: Melody's blog
Saturday, June 5, 2010
Guacamole
2 avocados
1 roma tomato
1 shallot the size of a quarter
2 cloves of garlic
1 lime
1 jalapeno pepper
Chop everything up and mix together. Add salt to taste. I've also added cilantro which is good.
From: Trader Jo's Guacamole Kit
1 roma tomato
1 shallot the size of a quarter
2 cloves of garlic
1 lime
1 jalapeno pepper
Chop everything up and mix together. Add salt to taste. I've also added cilantro which is good.
From: Trader Jo's Guacamole Kit
Sunday, May 30, 2010
Fruit Soup
¾ c. sugar
1 c. water
1 c. peach juice (or another cup of water, which is what I always do instead)
3 Tb tapioca (be sure to use the “minute brand” quick cooking tapioca!)
6 oz orange juice concentrate
1 ½ c. water
2 cans mandarin oranges (with or without juice)
1 quart sliced peaches - (you can use 1 large can of peach slices, but I would not add the heavy syrup – I always try to use Lite peaches that have been bottled with pear juice and water, in which case I add the juice. Also, cut up the slices so they are bite-size.)
2 c. fresh strawberries, sliced, just before serving
2 bananas, just before serving
1 bag frozen raspberries, thawed but still cool and firm (or an equivalent amount of fresh) or other berry mix (raspberries give the juice a red tint, without raspberries it is an orange color. I almost always use a tri-berry mix which includes raspberries, blueberries and blackberries.)
Bring sugar, water, peach juice and tapioca to a boil. Continue boiling on medium high for about 10 minutes, stirring often. Some tapioca will be clear and other granules will have a white center. Take off heat. Let sit for 30 minutes. (This is when the tapioca will become more clear.)
Add 6 oz orange juice concentrate and 1 ½ c. water. Chill overnight.
Add mandarin oranges and peaches. Before serving add strawberries, bananas, and raspberries.
From: sisterscafe
Thursday, May 27, 2010
Fiesta Chicken Pasta Salad
1 pkg Hidden Valley Fiesta Ranch dip mix
½ c. oil
½ c. vinegar
½ c. oil
½ c. vinegar
1 lb cooked, shredded or cubed chicken (about 1 ½ to 2 breasts)
3/4 box garden rotini
1 can black beans
1 can black olives, halved
2 -3 tomatoes, chopped
Frozen corn
Mix dressing mix, oil, and vinegar in small bowl and set aside. Combine chicken, cooked pasta, beans, olives, and tomatoes in large bowl. Add dressing and frozen corn about 20 minutes before serving. Be sure to toss again just before serving, as the dressing will seep to the bottom.
From: sisters cafe
Wednesday, May 12, 2010
Chocolate Cobbler
- 1 cup All-purpose Flour
- 2 teaspoons Baking Powder
- ¼ teaspoons Salt
- 7 Tablespoons Cocoa Powder, Divided
- 1-¼ cup Sugar, Divided
- ½ cups Milk
- ⅓ cups Melted Butter
- 1-½ teaspoon Vanilla Extract
- ½ cups Light Brown Sugar, Packed
- 1-½ cup Hot Tap Water
Preheat oven to 350 degrees.
First stir together the flour, baking powder, salt, 3 tablespoons of the cocoa, and 3/4 cup of the white sugar. Reserve the remaining cocoa and sugar.
Stir in the milk, melted butter, and vanilla to the flour mixture. Mix until smooth.
Pour the mixture into an ungreased 8-inch baking dish. I prefer my small oval Corning Ware glass dish.
In a separate small bowl, mix the remaining white sugar (it should be 1/2 cup), the brown sugar, and remaining 4 tablespoons of cocoa. Sprinkle this mixture evenly over the batter.
Pour the hot tap water over all. DO NOT STIR!
Bake for about 40 minutes or until the center is set.
Let stand for a few minutes if you can hold yourself back. Serve with homemade ice cream using the gooey sauce to spoon over all.
From: tastykitchen.com
Perfect Cupcake Frosting and Filling
The Vanilla Version
3 T Flour
1/2 C milk (whole milk is best, but I used non-fat when it's all I have and it's actually fine)
1/2 C real butter
1/2 C sugar (that's granulated sugar, not powdered sugar)
1 t vanilla extract, or other flavor if you wish.
Whisk together the flour and the milk. Heat in a small sauce pan on medium heat. Whisk continuously until it starts to thicken. I think this is the critical point for any of you who have had problems with this recipe. I have a feeling people are under-cooking this part. Let it cook, while stirring, until it looks like pudding (you should be able to see the bottom of the pan when you stir it). Even though it's thick, you can still strain it through a mesh strainer (just whisk the mixture in the strainer to push the thick stuff through) and then let it cool completely to room temp. or chill it in the fridge. It needs to be cooled completely. If you don't let it cool completely, it will melt the butter and you'll have runny frosting.
It an electric stand mixer, beat the butter and the sugar for a minute or two until well combined and fluffy. You'll want to use the whisk attachment on a stand mixer, not the flat paddle. Then while beating, add in the thickened milk mixture and the vanilla. Beat on the highest speed you can get to without it spraying all over the place for 7 minutes. Yes, 7 whole minutes, maybe even 8 or 9. I know that seems like a long time, but that's when the magic happens!
You will be scared because it will look like a weird goopy mess at first and you'll wonder what on earth you did wrong. Keep beating and something amazing happens. It goes from that goopy mess to something thick, velvety smooth, and perfectly fluffy.
Use it to fill cupcakes or other pastries, or as a frosting on top. You can't go wrong putting this on just about anything :)
One batch makes enough to frost 12 cupcakes with BIG tops. If you're just spreading a little on top, it will do 24.
After trouble-shooting with a lot of people, here are some helpful Notes:
1. Use real butter, and a good name-brand. Cheap butter does weird things.
2. If you beat for the 6-8 minutes and the mixture still looks strange, beat longer and at a higher speed if you can. It should come together, but it takes a little patience!
3. Store at room temperature in a sealed container. Frosting may separate in the fridge, but you can store it overnight if left at room temp and in a well sealed container.
The Chocolate Version
2/3 cup granulated sugar
1/3 cup all-purpose flour
3 tablespoons unsweetened cocoa powder
1 cup milk
1 cup real butter, softened
1 cup semi-sweet chocolate chips, melted
Optional: Additional cocoa powder as needed
Melt your chocolate chips if you haven't already and set aside to cool.
In a small saucepan, whisk together sugar, flour, cocoa, salt and milk; bring to a boil, whisking frequently. Boil 1-3 minutes or until thickened like a thinned pudding. Remove pan from heat and strain mixture into a small bowl. Cool completely in the refrigerator or freezer.
When chocolate flour mixture is cooled, beat the butter until creamy, about 1 minute. Beat in the cooled chocolate mixture until well combined fluffy, about 1 minute. Finally add in melted chocolate and beat again until well combined and fluffy, about 2 minutes. If desired, add additional cocoa powder to taste, up to 4 tablespoons. Spread or pipe frosting on to cupcakes or cake.
Makes enough to frost 24 cupcakes.
Storage: Store unused frosting in fridge and bring to room temperature before using again. If needed, beat with an electric beater before using.
From:ourbestbites.com
Thursday, May 6, 2010
Homemade Mayonnaise
Ingredients:
1 egg
1/2 c oil (any kind will do)
1 tsp salt
3 tsp lemon juice
1/2 tsp prepared mustard (optional)
Equipment Needed:
Whisk/Beater/Mixer/Immersion Blender
AND a Deep Cup or Bowl
OR Food Processor/Blender
Instructions:
Step 1. Beat (I'm using this word to mean whatever it is you'll be be doing with your beater, blender, mixer, or food processor) your egg for one whole minute or longer. Do not skip or cut short this step, or your mayonnaise will fail.
Step 2a. If you're using a blender, food processor, or mixer on a stand, or if you have an assistant to give you an extra set of hands, after that first minute is up, pour a very slow steady stream of oil into your egg while it is still being beaten.
Step 2b. If you don't have your hands free, because, like me you're using an immersion blender or beater or whisk, pour one teaspoon of oil into the egg, beat for 10 seconds, add 1 more teaspoon, beat some more, until all the required oil has been combined with the egg.
Note: When you've already poured in a quarter of your oil, the egg should start thickening up. If it is still as runny as when you started, the mayonnaise has most likely failed- but don't throw that out yet- see the flop fix tip at the bottom of this post.
Step 3. When you've finished adding all your oil, you should have a mayonnaise, albeit a very bland version, the same texture and consistency as the store bought variety. If it looks like mayo but is a little looser, add more oil, incrementally, until it is the thickness you desire. (Yes, paradoxically, the more oil you add, the thicker it will be, provided you don't add the oil too quickly.)
Step 4. Mix in the salt, lemon juice, and mustard, adding more or less to taste.
Notes:
Oil types- Any oil or fat will work for this, provided it is at a liquid state when preparing the mayo. Vegetable oils, coconut, palm, nut, olive oils can all be used, as can liquefied animal fats such as lard, beef tallow, ghee, or chicken fat. Keep in mind that if you plan on refrigerating this condiment or anything made with the mayo, that only oils that remain liquid when cold will allow the mayonnaise to keep its texture once refrigerated. Mayonnaise made with more solid oils, like tallow or palm oil will develop a butter like consistency once refrigerated, and therefore should be prepared right before consumption.
Flop Fix Tip- If your mayo flopped, you'll have a thin runny liquid instead of the desired condiment. This isn't a problem. For your re-do, you can reuse the same ingredients as before, just add an extra egg. To fix your flop, beat your new egg, but for longer this time than you originally did. Now you simply use the flopped mayo instead of the oil this recipe calls for. This time, add the oil much more slowly than last time. Adding too much oil at one time is usually the reason for the flop. To ensure that the mayo doesn't flop the second time around, make sure to beat the egg longer, and beat the mixture for longer in between each time that you add your very scant teaspoon of oil.
Given up on making mayo once it flopped? I can understand. Once it took me till try number 3 to get it right!Instead of throwing out the flopped mayo or trying again to make mayo, you can use the flopped mayo in most recipes that call for oil. The flopped mayo works especially well in salads, etc.
From: pennilessparenting.com
Tuesday, April 27, 2010
Sweet and Hot Jalapeno Dip
1 5lb 12 oz can of La Costena Green Pickled Jalapeno Peppers (Costco)
4 lb of sugar
1 gallon glass jar
Club crackers
Cream cheese
Drain juice off Jalapeno peppers. Remove stems and seeds (leave seeds if you want it hotter) then slice.
Optional : add sliced carrot, baby corn, green peppers, onion, etc. Put Jalapeno and other vegetable into jar. Cover with sugar. Stir.
Stir or shake once a day for 5 days.
From: Becky Tucker
Do not put in refrig.
Serve: club cracker spread with cream cheese top with jalapeno.
Option: use the syrup to drizzle over crackers
Wednesday, April 21, 2010
My Good Friend's Blog
Here is a post that contains many easy-peazy-lemon-squeezy recipes. Check it out!
Monday, April 19, 2010
Grandma's Homemade Rach Dressing
Makes a lot- so beware. The recipe is from the grandma of Mindy at sisterscafe and she said her grandma makes it by feel, so the amounts are approximate.
6 1/2 cups regular mayonnaise
1 quart buttermilk
3 Tbsp onion salt
1 Tbsp accent
3 Tbsp garlic salt
3 Tbsp white pepper
3 Tbsp flaked parsley
Mix by hand and then put it in a bottle. Over time it will separate and water will settle to the bottom; do not remix.
From: www.sisterscafe.blogspot.com
6 1/2 cups regular mayonnaise
1 quart buttermilk
3 Tbsp onion salt
1 Tbsp accent
3 Tbsp garlic salt
3 Tbsp white pepper
3 Tbsp flaked parsley
Mix by hand and then put it in a bottle. Over time it will separate and water will settle to the bottom; do not remix.
From: www.sisterscafe.blogspot.com
Chocolate Truffle Sauce
3/4 cup whipping cream
2 Tb butter
2 cups semisweet chocolate chips
1 t vanilla
Put butter and cream in a saucepan and heat over medium-low heat until cream is hot. Do NOT BOIL. Remove from heat and add chocolate. Let it melt then whisk until smooth and add vanilla.
From: sisterscafe
2 Tb butter
2 cups semisweet chocolate chips
1 t vanilla
Put butter and cream in a saucepan and heat over medium-low heat until cream is hot. Do NOT BOIL. Remove from heat and add chocolate. Let it melt then whisk until smooth and add vanilla.
From: sisterscafe
Sunday, April 11, 2010
Cadbury® Creme Egg
1/2 cup light corn syrup
1/4 cup butter, softened
1 teaspoon vanilla
1/4 teaspoon salt
3 cups powdered sugar
4 drops yellow food coloring
2 drops red food coloring
1 12-ounce bag milk chocolate chips
From: Top Secret Recipes
1/4 cup butter, softened
1 teaspoon vanilla
1/4 teaspoon salt
3 cups powdered sugar
4 drops yellow food coloring
2 drops red food coloring
1 12-ounce bag milk chocolate chips
| 1. Combine the corn syrup, butter, vanilla, and salt in a large bowl. Beat well with an electric mixer until smooth. 2. Add powdered sugar, one cup at a time, mixing by hand after each addition. Mix well until creamy. 3. Remove about 1/3 of the mixture and place it into a small bowl. Add the yellow and red food coloring and stir well to combine. 4. Cover both mixtures and refrigerate for at least 2 hours, or until firm. 5. When mixtures are firm, roll a small, marble-size ball from the orange filling, and wrap a portion of the white filling around it that is roughly twice the size. Form this filling into the shape of an egg and place it onto a cookie sheet that has been brushed with a light coating of shortening. Repeat for the remaining filling ingredients, then refrigerate these centers for 3 to 4 hours or until firm. 6. Microwave chocolate on high speed for 1 minute, stir gently and microwave again for 30 seconds more. Stir again. You want the chocolate to melt slowly. If you heat it up too fast it may seize up on you, and you'll have to start over. 7. Use a fork to dip each center into the chocolate, tap the fork on the side of the bowl, then place each candy onto wax paper. Chill. 8. After 1 to 2 hours of chilling, dip each candy once more and chill for several hours, or until completely firm. Makes 2 dozen candy eggs. |
From: Top Secret Recipes
Friday, April 9, 2010
Gooey Butter Cake
Cake:
1 yellow cake mix
1 egg
8 tbs butter, melted (1 cube)
Filling:
1 8 oz cream cheese, softened
2 eggs
1 tsp vanilla
8 tbs butter, melted (1 cube)
1 15 oz box powdered sugar
Preheat oven 350
Lightly grease 13 x 9 baking pan
Cake: Combine cake mix,egg and melted butter. Pat batter into the bottom of pan.
Filling: Beat cream cheese until smooth add eggs, vanilla and melted butter. Add powdered sugar and mix well.
Spread over cake batter.
Bake for 40-50 minutes. It should look golden brown and is
My notes: Becky INSISTS that it's best served chilled but I ate it at room temp and it was so good I wanted to commit suicide! (But I didn't)
Tuesday, March 16, 2010
"The Best Frosting I've Ever Had"
(As reported by pioneerwoman.com. I've actually never tried it.) **Does the period go inside or outside the parenthesis? I always get this mixed up and it bothers me!
- 1 cup Milk
- 5 Tablespoons Flour
- 1 teaspoon Vanilla
- 1 cup Butter
- 1 cup Granulated Sugar (not Powdered Sugar!)
Bake your favorite chocolate cake and let it cool.
In a small saucepan, whisk flour into milk and heat, stirring constantly, until it thickens. Remove from heat and let it cool to room temperature. (If I’m in a hurry, I place the saucepan over ice in the sink for about 10 minutes or so until the mixture cools.) Stir in vanilla.
While the mixture is cooling, cream the butter and sugar together until light and fluffy. Then add the cooled milk/flour/vanilla mixture and beat until it all combines and resembles whipped cream.
Wednesday, March 10, 2010
Tuesday, March 2, 2010
Chickpea Noodle Soup
serves 6 (can easily be halved)
1 tablespoon olive oil
3 cloves garlic, chopped
8-10 cups chicken broth --can use vegetable broth
1/2 teaspoon crushed red pepper flakes
1 lb pasta (I used whole wheat angel hair, broken in half)
2 15.5-oz cans chickpeas, drained and rinsed
black pepper, to taste
shaved Parmesan or Asiago cheese
(I think if you have fresh parsley--that would be good too)
In a large pot, heat olive oil, garlic and crushed red pepper flakes. Saute for a few minutes, then add broth. Bring broth/ garlic mixture to a boil, over high heat. Stir in pasta. Reduce heat to medium-high, and add chickpeas. Gently boil, 8-12 minutes (depending on what pasta you use), until pasta is cooked through. Season to taste with black pepper.
From: sisterscafe.blogspot.com
Faux-tisserie Chicken
1 whole chicken, small enough to fit in your slow cooker
Make 3 balls of aluminum foil and place them in the bottom of your slow cooker. These hold the chicken off the bottom so the hot air can circulate all around the chicken and so it's not stewing in its own juices.

Rinse chicken, including the cavity, and pat dry with paper towels. Place the chicken on its back so the breast is facing up and the legs are on the plate. If you want (and I actually strongly recommend that you do UNLESS you're looking for a neutral flavor), pull the skin up all around the chicken. This does involve sticking your hand between the skin and the breast. Oooh, sounds dirty. Slice a few garlic cloves in half lengthwise and stick them under the skin. You can also arrange a couple sprigs of fresh herbs like rosemary, thyme, and/or sage under the skin. This makes a very pretty chicken when it's all cooked and adds a lot of flavor.
Rub salt-based seasoning VERY liberally onto the skin of the chicken. Place chicken breast-up on the foil in the slow cooker, cover, turn heat to low, and leave it alone for 7-8 hours.
From: ourbestbites.com
Salt-based seasoning (Seasoning salt, Cajun seasoning, lemon pepper with salt in it, etc. Just make sure salt is one of the first ingredients on the label.)
OPTIONAL:
Whole garlic cloves, peeled
Fresh herbs
Fresh herbs
Make 3 balls of aluminum foil and place them in the bottom of your slow cooker. These hold the chicken off the bottom so the hot air can circulate all around the chicken and so it's not stewing in its own juices.

Rinse chicken, including the cavity, and pat dry with paper towels. Place the chicken on its back so the breast is facing up and the legs are on the plate. If you want (and I actually strongly recommend that you do UNLESS you're looking for a neutral flavor), pull the skin up all around the chicken. This does involve sticking your hand between the skin and the breast. Oooh, sounds dirty. Slice a few garlic cloves in half lengthwise and stick them under the skin. You can also arrange a couple sprigs of fresh herbs like rosemary, thyme, and/or sage under the skin. This makes a very pretty chicken when it's all cooked and adds a lot of flavor.
Rub salt-based seasoning VERY liberally onto the skin of the chicken. Place chicken breast-up on the foil in the slow cooker, cover, turn heat to low, and leave it alone for 7-8 hours.
From: ourbestbites.com
Tuesday, February 9, 2010
Ruby Tuesday® Strawberry Tallcake for Two
Strawberry Mousse and Sauce
1 10-ounce package frozen strawberries in syrup
1 3/4 cups water
1 3-ounce package strawberry Jell-O
1 cup heavy cream
Sponge Cake
5 eggs, separated
1 1/2 cups sugar
1/2 cup cold water
2 teaspoons vanilla
1 1/2 cups all-purpose flour
1/2 teaspoon baking powder
1/2 teaspoon salt
1/2 teaspoon cream of tartar
12 to 18 scoops vanilla ice cream (1/2 gallon)
1/2 pint fresh strawberries, sliced
1 can whipped cream
1. Defrost the frozen strawberries and pour the entire package, including the syrup, into a blender or food processor and puree for 10 to 15 seconds until smooth.
2. Combine the strawberry puree with 1 1/2 cups of the water in a small saucepan over medium heat.
3. When the strawberry mixture comes to a boil, add the entire package of Jell-O, stir to dissolve, and remove the pan from the heat to cool.
4. When the strawberry mixture has cooled to room temperature, divide it in half into two medium bowls.
5. Beat the whipping cream until it is thick and forms peaks. Fold the cream into one of the bowls of the strawberry mixture until well combined. This is your strawberry mousse. Cover and chill.
6. To the other bowl, and the remaining 1/4 cup of water. This is the strawberry syrup. Cover and chill this mixture as well.
7. Preheat the oven to 350 degrees F.
8. Beat the egg yolks until they turn creamy and a much lighter shade of yellow.
9. Add the sugar and blend it well into the yolks.
10. Add the water and vanilla and combine well with the yolks mixture.
11. Sift together the flour, baking powder, and salt, and add it to the yolk mixture. Mix well until the batter is smooth.
12. In a separate bowl, beat the egg whites until smooth, then add the cream of tartar. Continue beating until the whites are stiff and form peaks.
13. Fold the egg whites into the batter and mix slowly just until well combined.
14. Pour the batter into an ungreased 17 x 11-inch cookie sheet (with turned-up edges all the way around) and bake for 25 to 30 minutes or until the top of the sponge cake is a light brown color.
15. When the cake has cooled and the mousse has firmed up, you are ready to assemble the cake. First divide the cake into three even sections by cutting down the width of the cake twice with a sharp knife. Be sure the cake has come loose from the pan. You may need to use a spatula to unstick the cake sections.
16. Divide the mousse in half and spread each half onto two sections of the cake. Carefully place the layers on top of each other so that the mousse has been sandwiched in the middle between the three layers. This cake can be stored in the refrigerator for several days until you need it.
17. When you are ready to assemble the dessert, slice the cake into 6 even sections. Put a slice into a medium-sized bowl (or a large goblet if you have one), then arrange 2 to 3 scoops of vanilla ice cream around the cake. Pour a sixth (just over 1/4 cup) of the strawberry sauce over the top of the cake and ice cream, sprinkle some sliced strawberries on top, then cover the thing with whipped cream. Repeat with the remaining servings.
From: topsecretrecipes.com
Wednesday, January 20, 2010
Ricotta Cheese Seasoning
Season your ricotta cheese when making lasagna to add a sweet touch that is divine.
To be mixed with 32 oz ricotta cheese:
1 egg
2 T Parmesan cheese
sprinkle parsley flakes
1/4 c sugar
sprinkle of cinnamon
To be mixed with 32 oz ricotta cheese:
1 egg
2 T Parmesan cheese
sprinkle parsley flakes
1/4 c sugar
sprinkle of cinnamon
Subscribe to:
Posts (Atom)
